
Duplicate Photos After Using the Umark Software for Windows 10
Umark is one of the most convenient tools if you want to watermark your photos in batches. If you are a photographer or a news website editor who needs to copyright images, this tool might help you save a significant amount of time by automating the task.
Although Umark is a handy tool that helps more than 200,000+ users across the globe, there is one issue it fails to tackle: duplicate images! While watermarking files with image logos or text, it is very likely that you will generate a bunch of duplicate or similar image files.
You can manually look for duplicates once or twice but after that, the task would simply get monotonous and tiring. After all, who has the time for all that hassle in today’s age. The good thing is that with tools like PictureEcho, you don’t have to perform this boring task manually. PictureEcho is a licensed, smart tool that uses computer algorithms to accurately detect all duplicate or similar images lying around in your computer. Unlike most duplicate photo finding tools, PictureEcho works with a wide range of file formats including JPEG, JPG, BMP, PNG, GIP, ICO, and TIF.
Compatibility
Currently, PictureEcho is available for Windows 7, 8, 8.1, as well as Windows 10.
How to Find Duplicate Photos with PictureEcho?
Head to PictureEcho’s official website to download the tool and run its installation setup.
Once you have the interface opened, click on the Add Path button to load all the folders that you wish to scan for duplicate images.
Decide whether you want to look for exact duplicates or also visually similar images. If you are using Umark to watermark images, it is possible that you tried various designs of watermarks on similar images. In this case, you might want to opt for the Similar Match option to detect all the unwanted similar images.

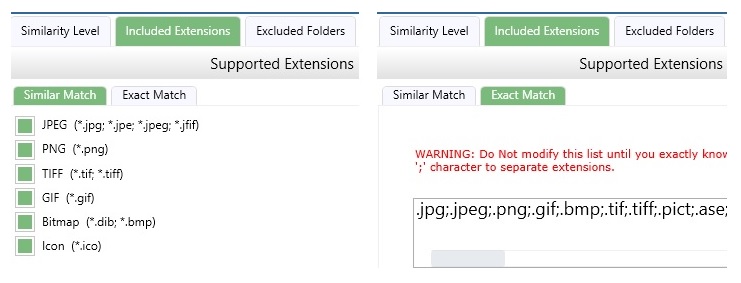
If you click on Similarity Settings and head to the Included Extensions tab, you can also include or exclude certain file types from the scan process.
After making all the settings, click on the Start Search button and wait while PictureEcho hunts down all the duplicate or similar images for you.
Once the scan is over, PictureEcho will throw up the scan results summary. Click OK and you will now be viewing all the duplicates that have been detected, along with the storage space they are occupying. You can also view the preview for any image by clicking it once.

Head to the Select Duplicates option and decide which duplicate you want to retain from each group. PictureEcho will let you apply automatic selection rules on the basis of file size (smallest or largest), date of creation (oldest or newest), image resolution (highest or lowest), and even file location. Alternatively, you can also manually review each group and then select the duplicates. However, that would take you a lot more time unnecessarily.

Lastly, head to Select Action. Now, you can decide whether you want to permanently delete the selected duplicates or move them to another folder.
If you regularly use tools like Umark to watermark images, you probably have several duplicate or similar files accumulated across different folders in your computer. Apart from wasting your storage space, in the long run, these duplicates severely hamper your computer’s performance as well. Hence, using PictureEcho to detect and timely get rid of duplicate files is definitely a wise investment!
Vikas is a technology enthusiast who loves writing articles on computers and technology. He writes on various topics related to software, software reviews, troubleshooting and tips & tricks to make people’s digital lives better.