
Transfer Photos from iCloud to Google Drive
iCloud and Google Drive are some of the most famous cloud drives that have made backing up and sharing data a very easy job for users on computers and smartphones alike. iCloud is an Apple-exclusive service, while Google Drive works on a cross-platform medium. This guide intends to demonstrate how to transfer photos from iCloud to Google Drive. So let’s dive into the solution.
Product Spotlight: EASY CLOUD MANAGER (ECM) to transfer files across clouds. ECM uses official cloud APIs and provides amazing options to manage files on cloud. Use it free here: https://www.easycloudmanager.com/
How it Works
Transferring photos from iCloud to Google Drive isn’t as easy as transferring data from one cloud drive to another, because iCloud will only work if you’re accessing it from an Apple device. So we will use Google Backup and Sync on your Apple device to sync the photos stored in the Photos folder on your Mac to Google Drive. We need to ensure that iCloud has already been synced to the same Mac. This will basically sync all the data from iCloud to the Mac and then sync it onwards to Google Drive.
Pre-requisite 1: Prepare iCloud Synchronisation
- Click the Apple icon and then select the About this Mac Option.
- Click the Storage tab in the next window, and then click the blue-colored Manage button.
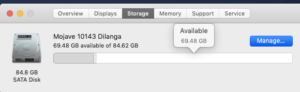
MacBook SSD space info
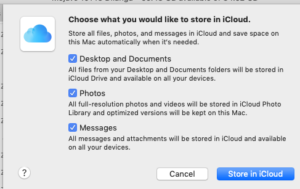
- Locate the Store in iCloud button in the next window and click it.
- Choose the content you want to be saved to iCloud. The choices include Desktop and Documents, Photos, and Messages. It is not necessary to select all the options, and it all depends on your requirements.
Pre-requisite 2: Install Google Back Up and Sync
Google Backup and Sync divides user data into 2 categories on Google Drive. My Drive simply contains data they have manually created/ added to Google Drive, while the Computers section creates a separate folder for each computer you have used to sync data to the same Google account. This means that if you have synced data to a Google account using your personal laptop, as well as your office Mac, you will see 2 folders named My Laptop and My MacBook.
The neat fact about this feature is that the My Drive folder remains the same across all devices, but the device-specific folder is unique for each device. This helps users sync their Google Drive easily without mixing it with files from a different device.
- Download Google Back Up and Sync from its download location, and then extract the setup file.
- Double-click the mounted image file and simply move the Backup and sync from Google icon to the Applications folder to launch the installation.
Solution 1: Move Files to My iMac in Google Drive
- Launch Backup and sync from Google through the Applications section and launch it.
- Sign in to your Google Backup and sync account and select the Photos folder in the My MacBook section. If you have photos in another location that you want to sync, click Choose Folder and navigate to that folder. You can also have all the photos and videos compressed if you select the High quality option.
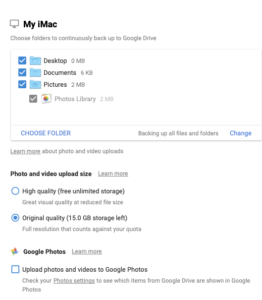
Selecting the MacBook photos location to be synced to Google Backup and sync
- Now that Google Drive has been configured, iCloud photos will be synced to the Pictures folder, from where they will be uploaded to Google Drive in real-time. This process needs both the applications to simultaneously run in the background, so make sure both of them are running in the background.
Solution 2: Move Photos to the Classical Google Drive Folder
The last solution demonstrated how to move files from iCloud to the My iMac folder in Google Drive. Photos present in this folder can’t be synced to any non-Apple devices, so we need to move this data to the My Drive section of Google Drive.
- Open the Photos app from the Dock and select all the photos that have to be uploaded.
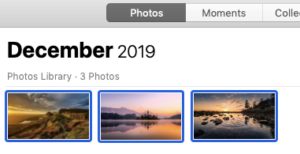
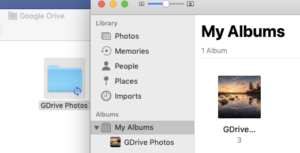
- Navigate to the My Albums folder and create a new photo album.
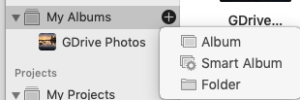
Create a new photo album
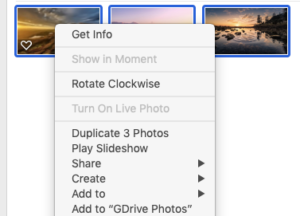
- Now go back to the Photos folder, select all the photos and then right-click the selected area and click Add to <photo album’s name> to add the photos to the photo album you created a while ago.
- Launch Google Back up and sync, right-click its icon in the menu bar and select Preferences.
- This time you have to select the Google Drive section and select the checkbox for Sync My Drive to this computer.
- Now select Sync everything in My Drive. These settings will ensure the entire content on your Mac and Google Drive stays synced at all times. Click Start to save these settings.
- Mac will warn the user about Google Backup and Sync from Google attempting to access a restricted area. Click Run Service in the prompt to give your permission.
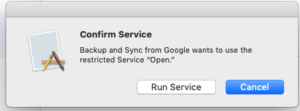
Click Run Service
- Open the Photos app again and locate the newly created album with the images. Now simply drag and drop the Album to Google Drive while Backup and Sync is running in the background. This causes the photos in the Photos app to be uploaded to Google Drive because iCloud is being constantly synced with the Mac. And now whenever photos are uploaded to iCloud, they will ultimately be synced to the Photos app.

Raza Ali Kazmi works as an editor and technology content writer at Sorcim Technologies (Pvt) Ltd. He loves to pen down articles on a wide array of technology related topics and has also been diligently testing software solutions on Windows & Mac platforms.