
Backup Computer to Google Drive Avoiding Duplicate Files
Manually backing up your files to external storage can be a bit of a pain. External storage devices come with their own set of advantages, but they can even lead to disaster if the device simply dies or if a virus cleans it up completely.
Google Backup & Sync lets you take advantage of Google’s free storage. It keeps all of your files in sync across all devices on which you’re signed in with a particular Google account. This helps ensure data safety, and help you access important data even on the move.
How Does Google Backup And Sync Work?
The procedure to setup Backup and Sync on your computer is pretty straightforward. Here is what is required:
- Download the Backup and Sync setup file and install it.
- During the installation, Google will prompt the user to select directories to backup. These directories could be anything like the Pictures, Documents, Desktop folders.
- The user can also add a custom folder path that they also want backed up. This could be a folder, subfolder or even a partition of the hard disk.
- Google will build a database of the files contained in those folders. The database contains date time stamp, file size and other information about every single file.
- When a file contents are changed, Google will update the database and upload the newly updated version onto the server-side.
Backing-Up A Partition V/s Individual Folders
If you are a paid user with tens of TBs of storage, you can upload an entire partition to Google Drive. But remember, Google Drive is not an emergency recovery tool. You won’t be able to use it to reinstall the operating system from scratch if your computer fails to boot or stops functioning at all. This is why backing up your system partition (typically, drive C:) to Google Drive is not worth the effort.
Instead, you should consider backing up non-system partitions that may contain your precious documents and other data. However, it can be a very high-bandwidth and time consuming task. Just turn on the sync procedure, attach your laptop to a power source and then leave it turned on overnight to complete the sync job.
If you are using a free Google account, you will have to be quite choosy about which folders you want to backup. This includes folders in the User’s library and individual data folders created by third-party applications to store app-specific data. For example, content creators who create video stories, digital advertisements with Wondershare Filmora, will find a special folder …\Wondershare Filmora 9\Projects containing their project files. You may want to add such special folders separately to secure your data for each application with Backup and Sync.
Get Unlimited Storage for Free
Backup and Sync gives the user total freedom to select a photo upload mode. Original quality allows you to store your photos and videos in the original resolution and picture quality. These uploads will count against your storage quota on Google Drive.
The High Quality mode compresses your photos and affects their quality to a certain extent. Unlike Original Quality, photos saved under this mode don’t count against your Google Drive storage quota. You get unlimited photo, video storage for free without spending a single penny.
The question is: Which photo format should you choose?
If you are a professional photographer, you should go with the Original quality option to keep your media files in the original detailed shape. If you are an individual or a home user or someone who doesn’t bother much about the photo resolution, your best bet is High quality. You won’t have to pay again for an external drive to store your stuff. You also get basic editing features to touch up your photos, if you choose to make your photos available on Google Photos.
Synchronization- A Two Way Street
The process of synchronisation can be a two way street. Google Backup & Sync offers the following two Sync Modes:
- Computer to Google Drive: This is an outgoing mode of traffic where your files are backed-up onto the Google Drive. You can restore your files at any time at your convenience. If you are backing up separate computers to the same Google account, Drive will create separate folders for those computers under the Computers section in Google Drive. This is a neat innovation that prevents any data from multiple computers being mixed up.
- Google Drive to Computer: Google creates a central access folder named Google Drive on your PC. You can access all the files from your Google Drive through this folder without having to connect to the Internet every time. Unless you want everything ready to edit at your doorstep, it’s recommended to sync only a short number of folders to save the HDD space on your system. You can sync individual files/ folders as and when required.
Backup Your Computer to Google Drive
Images larger than 200 MB of size or 150 mega pixel are not supported. The maximum video size supported is 10 GB. If your media is smaller than 256*256, it won’t be compatible.
Step # 1: Download & Install Client
Visit the Google Backup & Sync official website and click on Download Backup and Sync. Agree to the terms and initiate the download. Wait for some time to download and install the program.
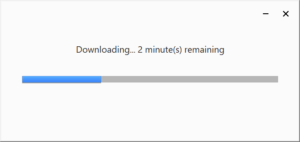
Backup and Sync download in progress
Click on Close after the installation finishes up.
Step # 2: Launch Backup and Sync
Click the upward Arrow icon in the Notification Area of the taskbar. Now click the Google Drive icon, and select Settings.
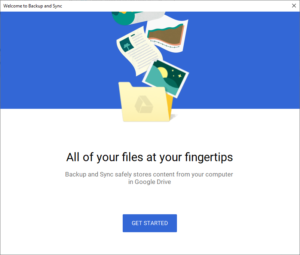
You should see a screen similar to the following. Click on Get Started.
Step # 3: Log-In to Your Account
On the Log-in page, enter your Google account email credentials.
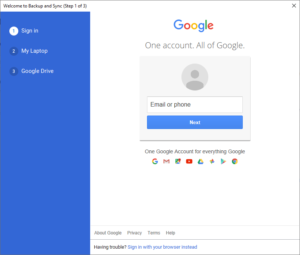
If you’ve turned on 2-Step Authentication, you’ll receive a validation code on your phone. If you haven’t, click on Try another way and try the OTP by SMS option.
After successful validation, you should see the following figure. Click on Got it.
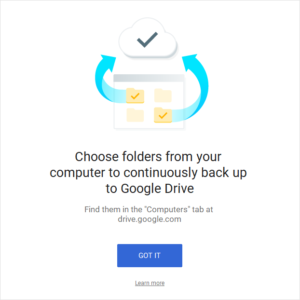
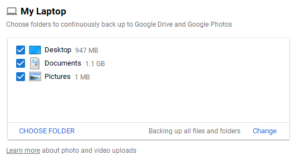
Select the folders you want to backup to Google Drive
Step # 4: Select Drive/ Folders to Backup
Use the folders list to choose folders to backup. To select a custom folder or drive, click on Choose Folder and select your desired path.
Step # 5: Choose Photo/ Video Size
Choose between High Quality (unlimited storage for free) or Original Quality (limited storage that counts against your Drive quota).
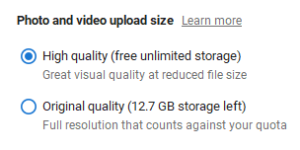
Select the image quality for photos
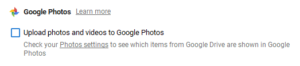
Step # 6: Make Your Media Available on Google Photos
To make your photos and videos available on Google Photos, select the Upload photos and videos to Google Photos option.
Step # 7: Choose Sync Mode
As discussed earlier, synchronization is a two-way process. You can specify whether you want to sync everything to your Google Drive account or sync only specific folder(s) of your choice.
If you rather wish not to sync any folders from your Google Drive account, simply uncheck the Sync My Drive to this computer option.
Once you’re done setting up Google Backup & Sync, click on Start.
Want to Add or Remove Sync Folders?
You can, at any time, add new folders to the Backup list or remove existing ones. Click the upward Arrow on the notification area and locate the Google Backup and Sync client icon. Click Settings (3-dots), select Preferences and configure your sync folders list.
Avoid Duplication & Save Storage
As we use Google to sync and backup stuff from different devices, it leads to duplication. Too many duplicates can eat up your precious storage. It is recommended that you check for duplicate documents and files on a periodic basis.
Cloud Duplicate Finder is a web-based tool which can be a great help. With CDF, you can find duplicates of any type (images, videos, music, documents, archives) from your Google Drive account.
Some of the prominent features of this software are as follows:
- No need to download any files. Search duplicates straight from your browser
- Highly secure system that accesses your data in a Google controlled environment
- CDF does not store your files or account passwords
- Supports a wide range of file formats
- In-house preview functionality can save a lot of time. No need to open any files separately
- Fully automated scanning. The algorithm based scan provides 100% accuracy
- Automatic selection patterns make it easier to batch select newest to oldest duplicates in each group and take action
- Freedom to delete your files or move them to a separate folder
- Save storage and pay less for your storage

Raza Ali Kazmi works as an editor and technology content writer at Sorcim Technologies (Pvt) Ltd. He loves to pen down articles on a wide array of technology related topics and has also been diligently testing software solutions on Windows & Mac platforms.