
Scan and Delete Duplicate Photos & Videos from Google Photos
Google has been a blessing to the world of Information Technology. Right from its early days of a search engine, it has grown into an IT giant that helps users with just about everything related to computing.
One of the most helpful products coming from Google is the Android operating system for smartphones, and linked to it is Google Photos, which helps users instantly sync any selfies or videos to the cloud as soon as they are captured.
Since July 10th, 2019, Google has cut off the sync connection between Google Drive and Google Photos, which they stated was very confusing for some users. So now users who had previously turned on the Google Photos folder in Google Drive can no longer avail that facility.
In these circumstances, how can a user scan their Google Photos data for duplicate photos and videos to get rid of all the clutter and disorganization? We’ve worked out a method that takes a little longer than before, but it delivers results. And getting the right results is surely what matters the most to users who are anxious about storage space and data disorganization.
This workaround will guide you to create an archive for our Google Photos data, download it to your computer and extract its contents. Now you will upload the data to Google Drive, scan it and delete the duplicates. Finally, you will upload the duplicate free data to Google Photos.
Note: The whole data download and upload process will be performed using the standard Google account API, which guarantees the highest possible standards of user data safety and security at all times.
Let’s get started.
Step 1: Create a Google Photos archive & download it
In this phase, we will guide you on how to create an archive for your Google Photos data.
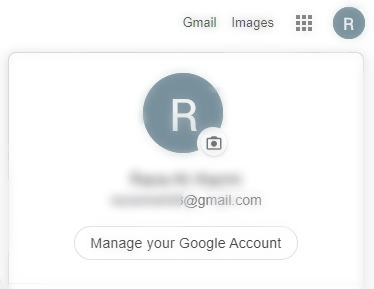
- Open up either the Google homepage or your Gmail inbox, click the circle in the top-right corner that says the first letter of your name and select Manage your Google Account.
- You will now be taken to a central location that contains all kinds of info related to your Google account. Locate the Data & personalization link on the left and click it.
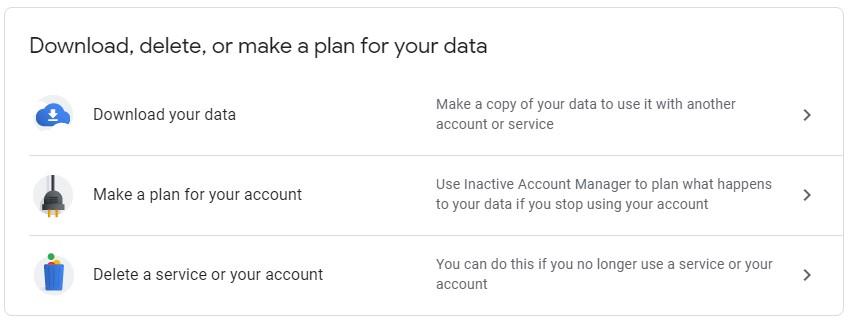
- On the next page that opened, scroll down until you come across the Download, delete, or make a plan for your data heading. Select the Download your data option underneath it.
Opting to download your Google account data
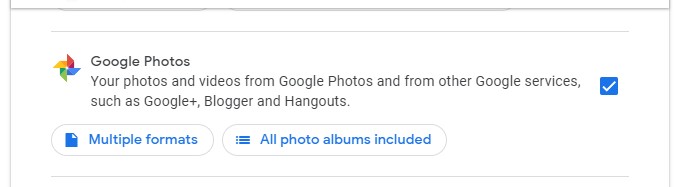
- The next page contains all services that are connected to any typical Google account. Scroll down just a little bit and click the Deselect all button, since we want to include only the Google Photos data.
- Now scroll further down until you spot the Google Photos entry. Select the checkbox for it. You can also click the All photo albums included button to select only specific albums for the archive, it’s totally upto you.
Select Google Photos for data download
- Scroll down to the bottom of the page and click Next step.
- The next page is the last stage in archive creation and contains a few basic choices you have to make.
- Select Send download link via email for the Delivery method option. This will create a downloadable archive and inform you via email as soon as it is ready.
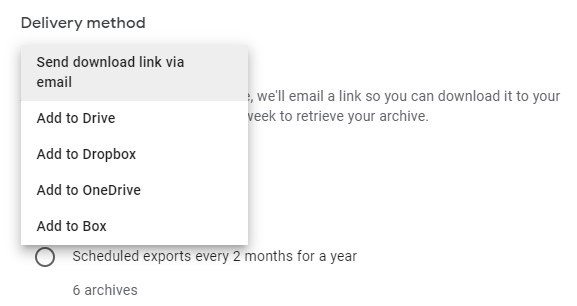
- Select One-time archive for the Export type.
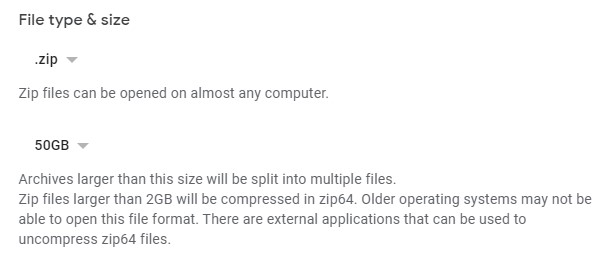
- Select .zip and 50GB in the File type & size section.
- Select Send download link via email for the Delivery method option. This will create a downloadable archive and inform you via email as soon as it is ready.
- Click Create archive.
- You will instantly receive an email at your Gmail address, informing you about a request for Google data archive being made through this account. It is safe to ignore that email.
- You will shortly receive another email informing you of your Google data archive being ready for download. Open the email and click Download archive.
- You will be required to enter your Google account password for verification.
- The archive download will be launched as soon as the next page is loaded.
Step 2: Sync the data to Google Drive
Now we will guide you on how to extract the data from the archive and sync it to Google Drive.
- Open up Google Photos and now delete all the data. Since this data contains duplicates, we are cleaning it up. Later on, we will upload all the (duplicate free) data once the duplicates have been removed.
- Now navigate to the location where the archive has been downloaded. It will be named as takeout-XXXXXXXXXXXXXXXX-001.zip (The X over here refer to an alphanumeric string).
- Extract the contents of this file to a folder, we will name it Folder A for the sake of clarity.
- Now use Backup and Sync from Google to sync Folder A to your Google Drive.
Step 3: The Duplicate Cleanup
This phase will guide you on setting up the duplicate photos & videos cleanup and executing it.
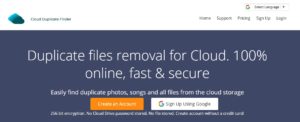
- Navigate to the Cloud Duplicate Finder website and sign up for an account.
Sign up for Cloud Duplicate Finder
- Activate your account from the email you just received in your inbox and set your account password.
- Select a Cloud Duplicate Finder payment plan of your choice.
- You will now be redirected to the scan area. Select the Google Drive tab and then click the Add New Drive button to add your Google Drive.

- Enter your password and click Allow in the prompt on the next page. Please note that all operations will be performed using the official Google API, to ensure your data is neither mistreated nor it falls in unauthorized hands.
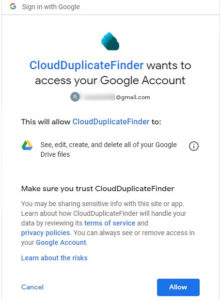
Using the official Google API
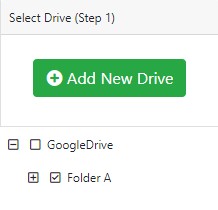
- Now you will notice all your Google Drive folders loaded up in the left pane of the cloud duplicate finder interface. Select Folder A.
- Click Custom and now select Videos and Images. Don’t forget to select the Preview option as well. Click Scan to launch the duplicate photos and videos scan for Google Photos data.

Customizing the scan
- You better get ready to be amazed at the number of duplicate photos and videos, and the storage space that was occupied, that are going to be revealed in the scan results popup.
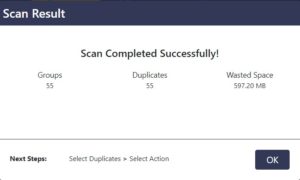
Scan Results popup
- Click on an image or video to check it’s preview in the Preview area. Click Select Duplicates once you’re ready to delete the duplicates and choose either of the 2 options.
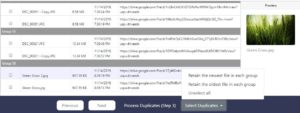
Select the Duplicates to be retained
- And the last step is to click Select Action and choose Permanent Delete.
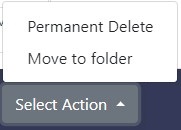
Deleting the duplicates
- This operation might take a while as the duplicates will be deleted, and the changes will be synced to Folder A on your computer.
Step 4: Put Back the Photos & Videos to Google Photos
And we finally move the data to where it belongs! Here is how we will do it.
- Open up Google Photos and click Upload | Computer.

Uploading back the duplicate free data to Google Photos
- Now select all the photos and videos in Folder A and press Enter.
- Google Photos will now upload all the data and within moments, your Google Photos will be filled up with all the photos and videos that were previously in it, minus the duplicates!
Folks, that is all. This is how you can scan and delete duplicate Google Photos data, after Google has simply done away with the sync facility between Google Drive and Google Photos.

Raza Ali Kazmi works as an editor and technology content writer at Sorcim Technologies (Pvt) Ltd. He loves to pen down articles on a wide array of technology related topics and has also been diligently testing software solutions on Windows & Mac platforms.
I don’t think these instructions would work. If I download all the images and deduplicate them locally and then upload them again, now I’ve just uploaded even another copy of each video and photo. I’d need to somehow delete all the photos and videos from my google photos for this to work and I haven’t found a way to delete all of them.