
Sync Data via GoodSync to OneDrive, Google Drive, Dropbox, and Amazon S3; Remove Duplicate Files
GoodSync is a file synchronization and backup service, developed by Siber Systems Inc. It offers a fast, and secure data transfer mode in which users can sync data from and/or to the cloud, local storage as well as removable media.
Delete Cloud (Google Drive, OneDrive, Dropbox) Duplicate Files
Cloud Duplicate Finder is totally safe. It uses the official Cloud APIS to deduplicate files
It can be installed by executing the setup file. The interface might seem a little different in the beginning, but it becomes very easy to use once the user gets acquainted to it.
File Backup
This is a very convenient, and efficient way to firmly backup all your data to a destination of your choice. The advantage this feature offers can’t be described enough. Data is a very critical asset for any individual, or a business concern. And so it must be backed up at all times as an insurance against unforeseen situations.
File Synchronization
This feature goes a step ahead of the previous one, and supports seamless sync facility involving cloud drives, local hard disk as well as removable media. This feature is triggered as soon as the user makes even the most minute change on either of the 2 locations.
Why is GoodSync Best for File Synchronization?
- GoodSync is a versatile software. It is compatible with a Windows PC, Mac, tablet, smartphone, and can be used in networking, USB, FTP, hard drive etc.
- It is offers flexible solutions for both personal and professional users. The plans are available free of cost, as well as the feature rich paid-for plans. All the paid-for plans offer a flat pricing mechanism applicable for a whole year, rather than per month or per quarter payments.
- GoodSync is straightforward and easy to use software. You can enable the sync process to be performed automatically at any specific time of the day, or when a particular action is triggered on the system, e.g. when the system boots up or when a flash drive is attached.
- You can use the Auto feature to set the backup and/or synchronisation jobs to be launched automatically after a set timeframe has lapsed.
You can synchronize all your files and data on multiple supported platforms. First, you have to download GoodSync from it’s website and install it. Now you are all set to make good use of the valuable features packed inside it.
OneDrive
GoodSync also provides its synchronization service for your Microsoft OneDrive data, which is particularly helpful for Windows 10 users. We say this because OneDrive comes with every Windows 10 installation by default, and so users of this operating system are more reliant on this cloud storage medium.
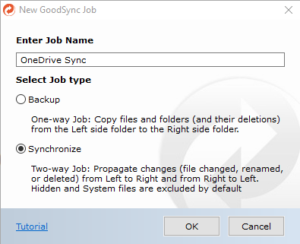
- Launch GoodSync via it’s desktop shortcut and click on the New Job button.
- Enter a name of your choice in the New GoodSync Job window and select the Synchronize option.
Opting for OneDrive sync
- Select the Left side folder to connect your OneDrive account.
- Select OneDrive Office 365 from the list of compatible services that will appear.
- Now click the Right side folder to add up the cloud drive/ your computer location to which you want to sync your OneDrive data.
- Click the Go button and enter your Microsoft account credentials.
- Select Yes in the prompt to allow your OneDrive data to be accessed.
- Click the Right side folder to add another cloud drive, location on your computer or removable media.
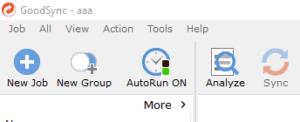
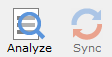
- Now click the Analyze button for GoodSync to analyze the data so that it can determine which the data which needs to be synced.
- GoodSync will now list out all the files in it’s interface that are to be synced. The neat feature at this stage, that really sets apart GoodSync is that it allows you to direct files to be synced from left to right, right to left, or not synced at all at this stage as well. So you can happily select different actions for different files.

Note: In this screenshot, note the symbols in the middle of the row. The green symbol for the first 2 rows means data will be synced from the left to the right, the crossed out symbol means data will be synced from right to left and the last circle means this file will be simply skipped for all kinds of sync operations. - Click Sync to launch the process.
Google Drive
You can use GoodSync to sync your Google Drive data to your computer, removable media, or one of the cloud drives that are supported by GoodSync. The process stays the same, and you stand to gain loads of benefits in the shape of data security.
Here is how you will do it:
- Click the New Job button, and type in the job name.
Adding up a new job
- Now select Synchronize and click OK.
- Select the Left side folder and select Google Drive.
- Now click the Go button and enter your Google account credentials and click Sign in in the same manner as you entered them for OneDrive.
- Click Allow in the next prompt to provide GoodSync with the required access privileges.
- Now your Google Drive data will be loaded up in the GoodSync interface.
- Click Analyze and then select whether you want all the files to be synced to the Right side folder or you want some files to be left out.
- Once you’ve made all the changes to the sync queue, click the Sync button to initiate the sync process.
Dropbox
Dropbox is one of the most popular cloud service solutions, and GoodSync provides for Dropbox data backup and sync facility. Once you have set it up, syncing the data is a very simple and easy process.
- Click on the New Job button and type in the name for the job.
- Select Synchronize and click OK.
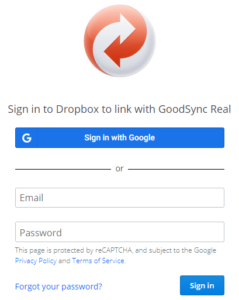
- Click the Left side folder to add up your Dropbox account.
- Enter your Dropbox account login credentials in the concerning area and click Sign in.
Signing in to your Dropbox account
- Click Allow so that your Dropbox data can be accessed by GoodSync.
- Now you need to add up another cloud drive or location on your computer and set the sync in motion after applying the settings in the exact same way as described above.
Amazon S3
Amazon S3 users can also benefit from the most handy backup and synchronize features offered by GoodSync. The whole process, as well as the benefits users stand to gain, stay the same in all cases.
- Launch GoodSync and click the New Job button.
- Enter the Job Name, select Synchronize option and click OK.
- Select the Left folder to connect to your Amazon S3 account.
- Enter the Bucket Name, Access Key ID and Secret Key in the following window.
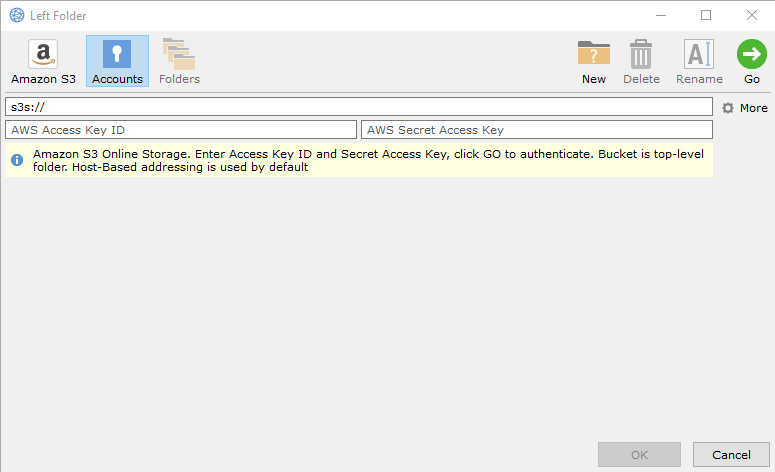
Note: In case you want help regarding your Access Key ID or Secret Access key, check this page. - When you enter the AWS credentials in the GoodSync interface, it will load your Amazon S3 data upon successful authentication.
- Now add up a cloud drive/ local folder via the Right side folder.
- Once all the steps have been performed, click Analyze | Sync to kickstart the process.
Remove Duplicate Files from OneDrive, Google Drive, Dropbox and Amazon S3
Saving up date on the cloud is a bliss and blessing both. However, cloud storage space tends to run out very soon if the user is not careful enough with organizing the data on it in a proper way. Today’s super fast Internet speeds mean huge volumes of data are synced to the cloud in a very short span of time.
But this simply does not mean users should choose to simply ignore the duplicates. These files tend to clutter the cloud drive, slow down searches (and data load times), and not to forget, eat up valuable storage space.
Cloud Duplicate Finder is a smart and ultra secure web service that handles data very efficiently. It uses the latest techniques to scan for duplicate files on the cloud and performs this whole job with unbelievable speed and accuracy. It uses the official APIs of OneDrive, Google Drive, Dropbox, Amazon S3 and Box to scan duplicate files. This ensures there is an absolute degree of data security at all stages of the data load, scan and deletion process.
The Process
Let’s see how the duplicate cleanup process unfolds at Cloud Duplicate Finder.
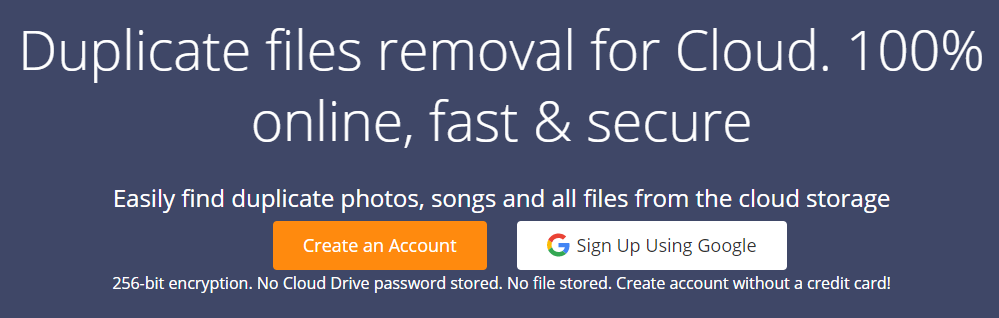
- Navigate to the Cloud Duplicate Finder website and click the Create an Account button. You can also use the Sign Up Using Google button to sidetrack the registration form and straightaway jump to the scan area. (If you’re signing up with Google, ignore steps # 2, 3 and 4).
- Complete the registration form and click Proceed.
- Click the activation link in the email to activate your account.
- Set the password for your Cloud Duplicate Finder account.
- Subscribe to a membership plan that matches your requirements.
- Navigate to the scan area and now click the cloud drive you want to scan.
- Enter the login credentials and allow it to access your data.
- Cloud Duplicate Finder will load all your cloud data.
- Select the folders you want to scan and then (optionally) select if you want to run an all files scan or a scan for select file types. Click Scan to launch the duplicate file scan.
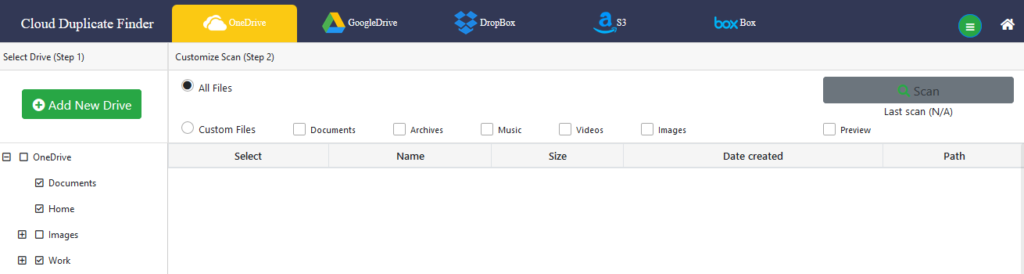
Customize the scan and then launch it
- The scan will be over pretty soon. Now you will be seeing the duplicates laid out in groups.
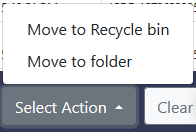
- Click the Select Duplicates button to choose if you want to retain the oldest or newest file in each group, and then click Select Action to choose if you want to delete the duplicates or move them to a folder (which will be located in the root of the drive).
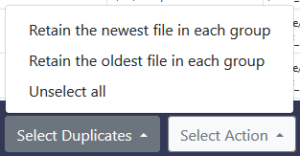
Note: The Move to folder facility is not available for Amazon S3 and Box due to their API restrictions.

Raza Ali Kazmi works as an editor and technology content writer at Sorcim Technologies (Pvt) Ltd. He loves to pen down articles on a wide array of technology related topics and has also been diligently testing software solutions on Windows & Mac platforms.