Box Duplicate Finder, Remove Duplicate Files, Photos, Music and Videos from Box Cloud Online
Duplicate files are a huge burden to modern computer systems as they waste a tremendous amount of valuable space for no good. This is not only a problem in local computer systems, but also in cloud platforms such as Box. This solution demonstrates how to weed out duplicate content, such as files, images, music, videos from Box with ease. It uses both the manual method, and as well as our online service called the Cloud Duplicate Finder to achieve the intended results.
The free version of Box provides 10GB of storage with a per file upload limit of 250MB and can be accessed from platforms like Windows, MacOS, Linux and smartphones.
Requirements
This guide requires the user to have a stable web browser installed on their computer, and signed up for an account on Box, as well as an account on Cloud Duplicate Finder website.
How to Clean up Duplicate Files, Images, Photos, Music and Videos from Box
Solution 1: Use Cloud Duplicate Finder
- Navigate to the Cloud Duplicate Finder website and sign in to your account, which can be created on the site for free. This website employs the industry standard SSL encryption; which serves as a mark of trust for users that their data is in safe hands and no one (including the team at Cloud Duplicate Finder) can ever access it. Users are recommended to use the latest version of their web browser for optimum results.
- Now switch to the Box tab. Click Add new drive and you will be redirected to a page where you will have to enter the login credentials associated with your Box account.
- The browser will now redirect to Cloud Duplicate Finder.
- Clicking on Load drive will result in the loading up all of your Box data in the pane on the left-hand side. The nodes with + marks before their names represent folders, whereas the rest are files. One of the best features about Cloud Duplicate Finder is that it will almost instantly load up your Box drive data, no matter how huge is!
- Simply select the target areas for the duplicate scan by clicking the checkbox for each folder you want to scan.
- The next step involves choosing the filetype(s) for the scan. We will briefly describe each of the 4 possible scenarios here for your ease.
-
Clean up Duplicate Documents from Box
If you want to search for duplicate documents in Box, you need to select Custom Files | Documents and Archives. This sets up the scan to look for duplicate documents (Doc, Docx, RTF, Txt) as well as duplicate archives (Zip, Rar, Tar) in Box.
-
Clean up Duplicate Photos from Box
To remove duplicate photos from Box, simply select Custom Files | Images. Just as you’ve guessed by now, this option will narrow down the scan towards only images (JPG, JPEG, PNG, BMP etc) and bring up results more quickly than a universal duplicate file scan for Box.
-
Clean up Duplicate Music and Videos from Box
If duplicate media content such as music and videos is what you’re wanting to scan your Box account for, select Custom Files | Music and Videos. Again, the scan will be over much sooner than a complete file scan.
-
Clean up ALL Duplicates from Box
This is the route you need to take if you think there are duplicates of multiple types in your Box drive. Just select the All Files radio box and you’re all set for a powerful scan that will target duplicates of all types.
-
- The last step before launching the scan is selecting the checkbox for Preview. This shows up exact image previews and provides the user with a fair picture about the file’s contents (for documents). Finally, click Scan to launch the Box duplicates scan.
- Once the scan is over, you can view information on the number of duplicates detected as well as the space they are occupying in the footer of Cloud Duplicate Finder. You will also be able to view the entire list of all the duplicates detected along with handy details for each file like name, size, date of creation and path.
- Click the Select Duplicates button to choose between retaining either the newest/ oldest file for each duplicate group. Note: All the items which have their checkbox selected will basically be moved to the Trash (in the next step), and other items with their checkbox not selected will be retained in Box.
- The final step involves clicking the Select Action button and choosing the Move to recycle bin option. This step will only move the duplicate data to the Trash section in Box, and will not remove it permanently.
- Once all the duplicates have been removed, Cloud Duplicate Finder will send out a confirmatory message as shown below. Please note that all the deleted files are highlighted in red.
- As soon as Cloud Duplicate Finder makes a change to your Box account, Box will start to replicate those changes to all computers this particular Box account is signed in.
- Navigate to the Trash section in Box where you will find all the files that have been deleted by the duplicate scan. Simply click the Delete All button on the top-right corner of the screen and click Okay in the prompt to signal your confirmation. Once the action has been successfully concluded, all the Box duplicates detected by Cloud Duplicate Finder will be permanently purged, and you would have freed up a significant chunk of your Box storage volume.
Solution 2: Use Windows Explorer and its Options
File Explorer is a powerful inbuilt application embedded within Windows. Its search Box can be put to good use to identify potential duplicates. Be advised that this method is hugely limited in providing accurate results, as it only takes into account file size, type, name, and modified date. Once the user gets the search results, they can manually inspect them to identify the duplicates. This is bound to be quite tedious, so following this route is only recommended when the number of files involved is very little.
- Install the Box desktop application on your computer. Now provide ample time for it to sync all the data to your computer the app.
- Once the sync is over, navigate to the Box Sync folder via File Explorer.
- Locate the search Box and then simply type in kind:format (format refers to the file type you want to search for, e.g. Photos, Music etc).
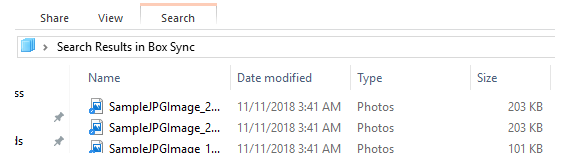
The search results will show up as seen in the following screenshot. The column heads such as Name, Date modified, Type, Size can be used to identify potential duplicates. For example, sorting the files in the search result by Size arranges all the search results in ascending/ descending order (for file size). Now you can manually inspect any files that appear to be potential suspects due to them being of the exact same size.
Note: You can simplify the search process by adding up (1 or more) of the size, date modified, type filters to refine the search result. For example, kind:documents AND ?size:1KB..50kB searches for documents which lie between 1KB and 50kB in size. Similarly kind:documents AND ?datemodified:?11/?2/?2018 .. ?11/?13/?2018 searches for documents modified between 2nd November 2018 and 13th November 2018.
- Once the duplicate content has been spotted, they can be simply deleted by selecting them and pressing the Delete key on the keyboard. The deleted content is then sent to the Recycle Bin. If the content is to be deleted for good, you can use the Shift + Delete shortcut combination to delete the duplicates permanently without moving them to the Recycle Bin.
- Once the duplicate content has been deleted, the Box desktop app will sync the changes to the cloud, and free up any space that was occupied by duplicates.